

How To Choose The Right Led Garage Lights 2026
Lighting is the single most overlooked upgrade in a home shop. You can have the best torque wrenches and the cleanest workbench, but if you’re squinting at shadows while torquing head bolts or cutting steel, you’re risking damage to your tools, your project, and your eyesight. Most garages are lit by old-school fluorescent tubes that flicker in the cold and cast a sickly green hue that hides rust and cracks. Upgrading to modern LED fixtures isn’t just about aesthetics; it’s about visibility, safety, and efficiency. This guide cuts through the marketing jargon to tell you exactly what specs matter when you’re hanging lights over your lift or workbench.
Quick Answer
For a standard two-car garage, install four 4-foot LED shop lights rated between 50W and 75W each, delivering roughly 8,000 to 10,000 lumens total. Prioritize fixtures with a Color Rendering Index (CRI) of 80+ for accurate color perception and an IP65 rating if you wash your car or live in a humid climate. Mount them in a staggered pattern along the centerline of the ceiling to eliminate shadows under your workbench and vehicle.
Table of Contents
Our Top Picks
Affiliate disclosure: if you buy through these links, we may earn a commission at no extra cost to you.

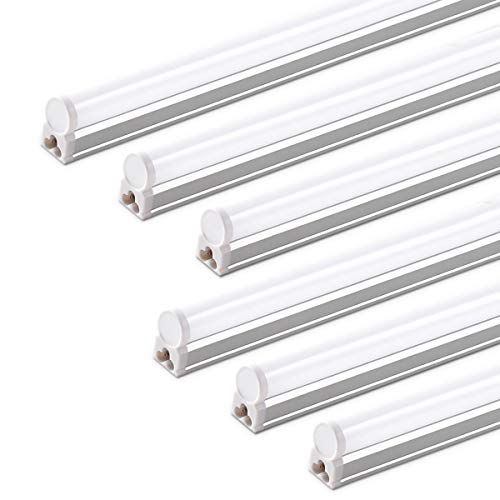

Understanding Lumens vs. Watts
Stop looking at watts to judge brightness. That’s a relic of the incandescent era. In LEDs, watts measure energy consumption, not light output. You want to focus on lumens. For a garage workspace, you need high intensity. A typical 4-foot LED shop light will range from 5,000 to 12,000 lumens depending on the driver quality and diode density.
Rule of thumb: Aim for at least 75 lumens per square foot for general garage lighting, but bump that to 100-150 lumens per square foot over your primary workbench and tool storage areas. If you spend hours welding, grinding, or assembling fine mechanical parts, under-lighting these zones will cause eye strain and mistakes. Don’t skimp on the driver. Cheap LEDs use cheap drivers that die after two winters. Look for brands that offer a 5-year warranty minimum.
Color Temperature and CRI
Color temperature is measured in Kelvin (K). The scale runs from warm yellow (2700K) to cool blue-white (6500K+). For a garage, stick to the 5000K to 6500K range. This "daylight" spectrum mimics natural sunlight, which improves contrast and alertness. Lower temperatures (3000K-4000K) feel cozy in a living room but make it hard to distinguish between similar shades of gray paint or subtle oil leaks.
Even more critical is the Color Rendering Index (CRI). CRI measures how accurately a light source reveals the true colors of objects compared to natural light, on a scale of 0-100. Standard cheap LEDs might have a CRI of 65, making red brake fluid look brown and green wiring look gray. You need a CRI of 80 or higher. If you do bodywork, painting, or detailed electrical diagnostics, aim for CRI 90+. It costs slightly more upfront but saves you from misidentifying wires or mismatching paint.
Mounting Strategies for Zero Shadows
Bad placement ruins even the best lights. The biggest mistake DIYers make is mounting a single light directly over the center of the workbench. This creates a deep shadow right where you’re working—your body blocks the light. Instead, use a staggered or parallel row configuration.
For a standard 8-foot wide garage, mount two rows of lights parallel to the side walls, spaced about 2-3 feet apart. For a single workbench area, mount two 4-foot fixtures perpendicular to the bench, spaced 18-24 inches apart. This cross-lighting eliminates shadows cast by your torso and tools. If you have a vehicle lift, position the lights so they run parallel to the car’s length, not across it, to avoid blinding glare when looking under the hood.
Durability and Environmental Ratings
Garages are harsh environments. Temperature swings, dust, metal shavings, and humidity kill electronics. If you live in an area with freezing winters, ensure the LEDs are rated for cold starts. Some cheap LEDs fail to ignite below 32°F (0°C) because the capacitor struggles in the cold. Look for fixtures explicitly rated for "Cold Storage" or "-40°F operation."
For dust and moisture protection, check the Ingress Protection (IP) rating. An IP65 rating means the fixture is dust-tight and protected against low-pressure water jets. This is essential if you wash your car inside the garage or if your shop is in a humid coastal area. If you’re in a dry, climate-controlled workshop, IP20 (indoor only) is fine and cheaper. Also, check the build material. Aluminum heat sinks dissipate heat better than plastic housings, extending the life of the diodes.
Dimming and Smart Controls
Do you need dimmers? Yes, but only if you buy compatible fixtures. Standard LEDs will flicker or buzz if paired with old incandescent dimmer switches. You must use LED-specific trailing-edge dimmers. Dimming is useful for reducing glare during evening work or saving energy when doing quick tasks.
Smart controls are a practical addition for modern shops. Wi-Fi or Zigbee-enabled fixtures allow you to turn lights on via voice command or automate them with motion sensors. Motion sensors are invaluable in tight spaces like under the sink or in deep storage cabinets. However, avoid smart bulbs for your main overhead lighting; they often have lower lumen output and shorter lifespans than dedicated LED shop light fixtures. Stick to smart *fixtures* or relay-based systems for reliability.
Wiring and Circuit Load
LEDs are efficient, but you still need to respect your electrical panel’s capacity. A typical 15-amp circuit can handle about 1,800 watts of continuous load. Four 75W LED fixtures draw only 300 watts total, leaving plenty of room for other tools. However, do not daisy-chain too many fixtures beyond the manufacturer’s limit (usually 6-10 units). Exceeding this can cause voltage drop, leading to flickering and reduced lifespan.
Always wire garage lighting to a dedicated circuit if possible, or at least separate from high-draw tools like air compressors or welders. Voltage sags from starting a large motor can cause LEDs to strobe, which is disorienting and potentially dangerous. Use 12-gauge wire for runs over 50 feet to prevent voltage drop. If you’re upgrading an old garage with knob-and-tube wiring, consult an electrician before adding new high-load circuits.
Frequently Asked Questions
Can I use LED shop lights in a cold garage?
Yes, but you must check the operating temperature rating. Many standard LEDs fail below freezing. Look for fixtures rated for "cold storage" or -40°F operation to ensure reliable startup in winter.
How many LED lights do I need for a 2-car garage?
Aim for 8,000-10,000 total lumens. This typically translates to four 4-foot fixtures (2500W each) or two high-output 8-foot fixtures. Focus more light over your workbench and tool walls than the open floor space.
Do LED lights attract insects?
Less so than fluorescents or incandescents. LEDs emit very little UV radiation, which is what attracts most flying insects. However, they do emit some blue light, which still draws bugs. For a bug-free zone, combine LED lighting with yellow "bug bulb" filters or exterior motion-sensor floodlights that turn off quickly.
Why does my new LED light flicker when I turn it off?
This is usually caused by "phantom voltage" or a lack of a neutral wire in the switch box. It can also happen if the dimmer switch isn’t compatible with LEDs. Try swapping the switch for an LED-rated model or installing a capacitor suppressor.
Are LED shop lights worth the extra cost over fluorescents?
Absolutely. LEDs use 50-70% less energy, produce no heat, contain no mercury, and last 10-20 times longer. The upfront cost is higher, but you’ll save on electricity and replacement bulbs within a year.
What is the best mounting height for garage lights?
Mount fixtures 7 to 8 feet above the floor. This provides optimal coverage without creating glare or obstructing movement. Ensure they are at least 18 inches away from any combustible materials, though LEDs run cool enough that this is rarely an issue.
Conclusion
Upgrading your garage lighting is one of the highest-ROI improvements you can make for your workshop. It transforms a dark, hazardous space into a precise, efficient environment where you can work safely and comfortably. Focus on high lumens, daylight color temperature (5000K+), and proper staggered mounting to eliminate shadows. Once you flip the switch on a well-lit shop, you’ll wonder why you waited so long. Start by mapping your work zones, calculating your lumen needs, and wiring a dedicated circuit for future expansion.


